Getting started
Accessing your product
You can download your new child theme from the link included in your order confirmation email, from your Brand & Build account, or your Divi Marketplace account.
You will have two files: child-theme-name.zip and child-theme-name-supplementary-files.zip.
child-theme-name.zip is your actual child theme. Do NOT extract this zip file, but DO extract child-theme-name-supplementary-files.zip as it contains a changelog, and any additional assets or information required for the child theme.
Before you begin
You must have the Divi Theme by Elegant Themes installed to use this Child Theme but it does not need to be active.
An Elegant Themes Membership is required to download the Divi Theme. The Divi Theme is NOT included with this child theme.
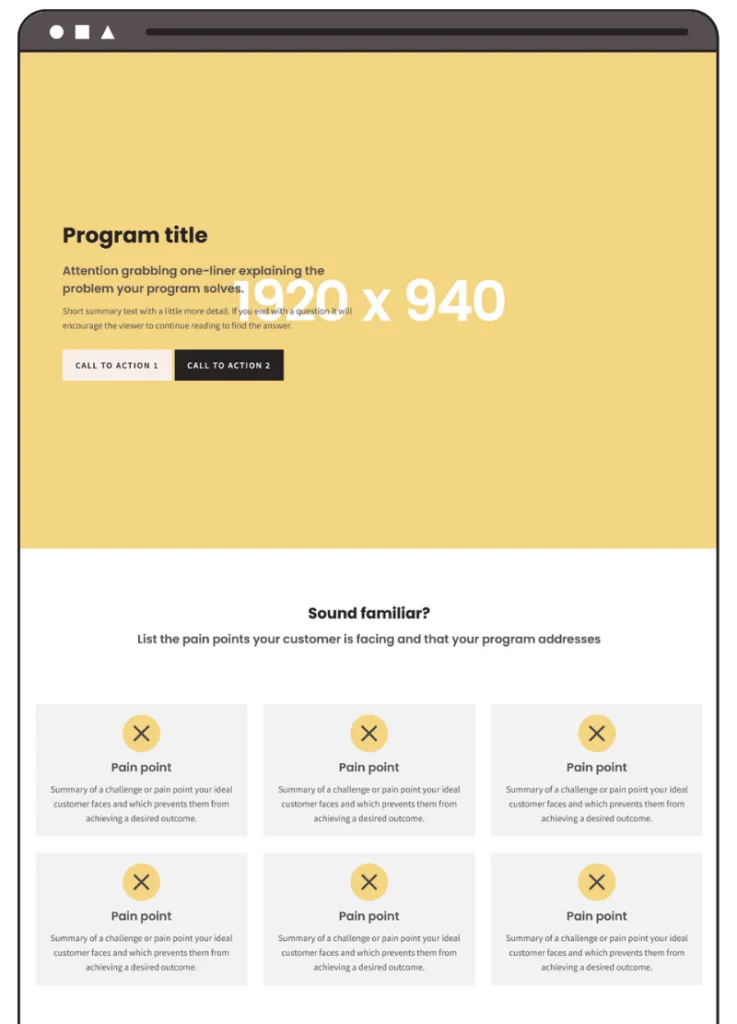
Please note: the images in the demo have been replaced with placeholder images in the actual theme files, and sizing information is supplied to make them easily replaceable.
To avoid any issues during installation it is highly recommended that you use this child theme on a fresh WordPress installation.
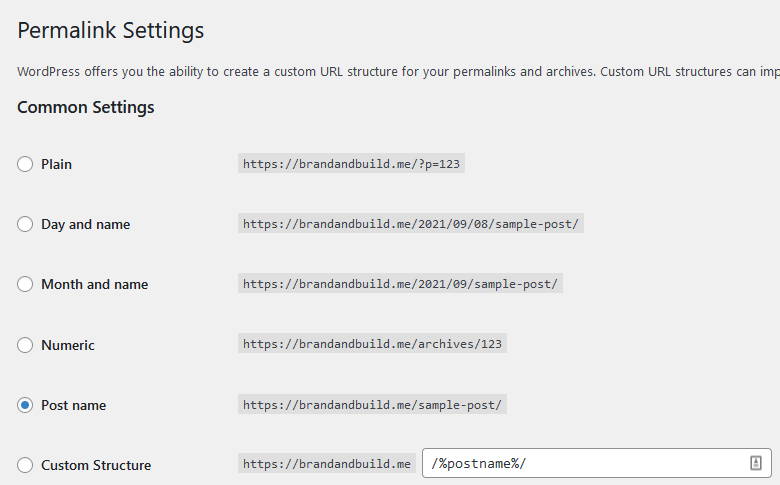
It is also a good idea for SEO purposes to navigate to Settings > Permalinks and set the Common Settings to Post name.
Theme installation
In your WordPress admin dashboard navigate to Appearance > Themes > Add New and click on Upload Theme. Locate the child-theme-name.zip file on your computer and then click Install Now.

When the install is complete click on Activate, you will then see the Child Theme as the active theme in your theme panel.
There is now a new item at the top of your WordPress Menu. Click the Import Options link.

On the next screen, you can uncheck any of the options. We recommend leaving everything ticked to, but there are explanations for what may be changed. Hit the Import Demo Content button once and wait.

You will be able to watch the import progress.

Once complete, click the link to check out your new homepage and it should look just like our demo, but with placeholder images. Once you have checked your site, you can come back to the import options and click Remove Demo Content & Import Functions. This will not remove any pages or posts etc, just the code required to install the child theme. It is safe to remove this once your theme is installed.

All done, have fun with your theme!
General customisation
Replacing images
Your child theme will install with placeholder images. Each image will display sizing information. These are these are the sizes we have used in our demo and the ones we recommend.
Divi presets
Your child theme uses the Divi preset system to make adding new content simple. Every module included comes with one or more presets, so if you need to create new pages you can add a module, select the relevant preset, and it will be styled to match instantly.
Extensive documentation on using Divi presets is found here.
The theme builder
Your child theme uses the Divi library and Theme Builder to style your website. Templates are included for every page you see in the demo.
Extensive documentation on the Divi Theme Builder can be found here.
Custom CSS
Wherever possible, colours are defined within the modules themselves. On occassion, we include custom CSS that affects the colours of elements if the option isn’t available via the module settings.
We have made it very simple for you to change the colours using CSS variables. You do not need to know how to code.
In your WordPress menu, navigate to Appearance > Theme Editor.

Ensure the child theme is selected in the dropdown on the right side, and then click on stylesheet.
You will see CSS variables for your product at the top of the stylesheet. Change the hex values of the colours to match your brand, save, and refresh your site for the changes to take effect.
If you see any red warnings as in the image above, you can ignore these. They are false-positive errors and there is nothing wrong.
Customising this theme
Using the Quentin script font
Some hosting environments may prevent the script font used in Karla from importing. If, when you have completed the one click install process, you find the font has not imported, follow these steps.
1 – Inside the karla-supplementary-files folder, you will find a link to the Quentin free script font. Click the link and download the font to your computer.
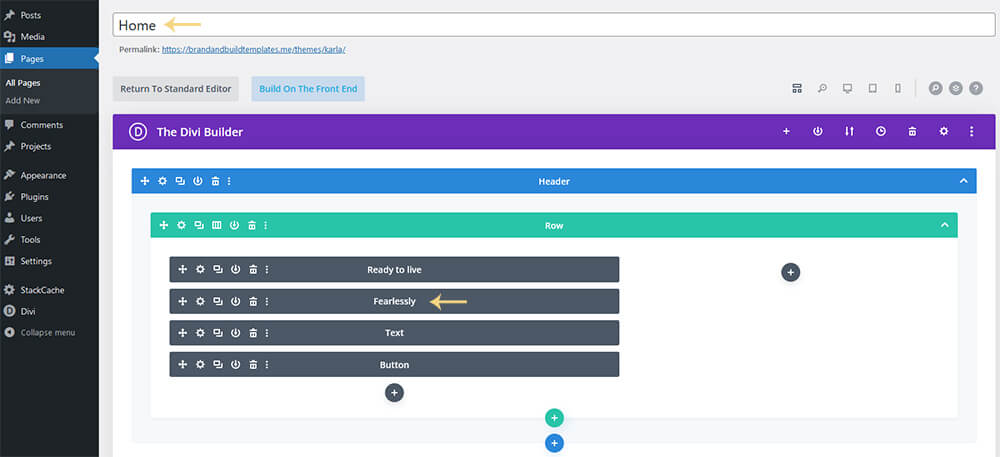
2 – On the site where you have installed Karla, open the homepage in the Divi builder, then open the module named ‘Fearlessly’ in the first section.
3 – In the Design tab, click the Heading Text toggle, and then the H1 heading. In the Heading font selection dropdown, click upload and choose the Quentin font you downloaded in the previous step.
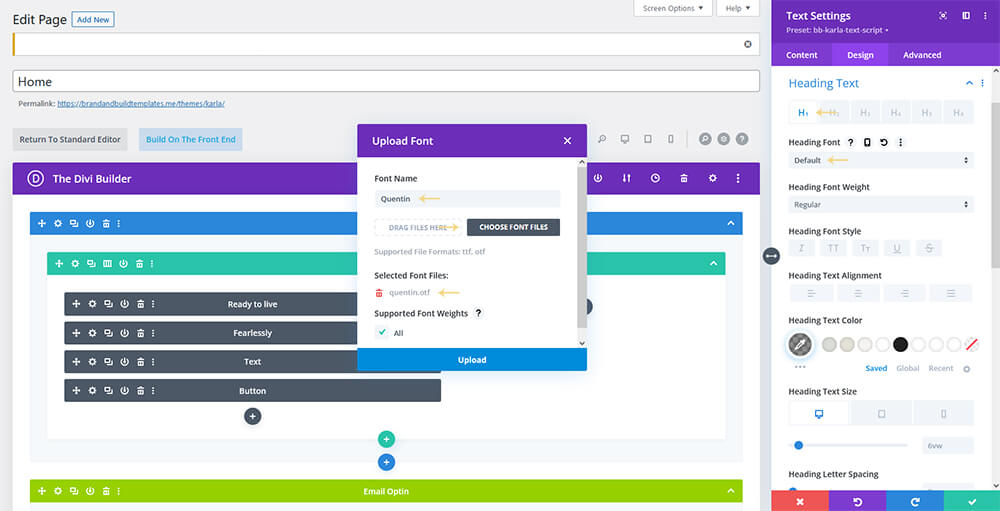
4 – Name the font and save the page.
You do not need to apply the font anywhere else, the presets will automatically detect the font, and everywhere the Quentin font is used, it should now appear.
If the font still does not appear, deactivate all options in the Divi performance settings and clear all browser, plugin, and server caches.
If you receive a WordPress error when trying to install the font, you can use this plugin to temporarily allow unrestricted uploads. You can uninstall the plugin again once the Quentin font is installed.
Edit single post dropcap
Karla comes with presets that include a styled dropcap for the first letter of single posts.
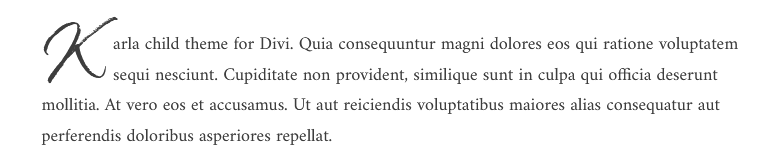
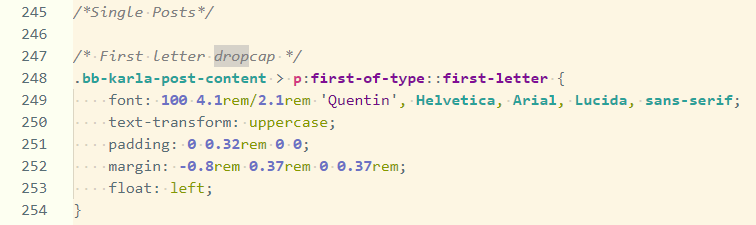
If you would like to edit or remove these dropcaps, find the First letter dropcap CSS within the stylesheet and either change, comment out, or delete it.
Edit styled links
Karla comes with presets that include styled links.
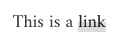
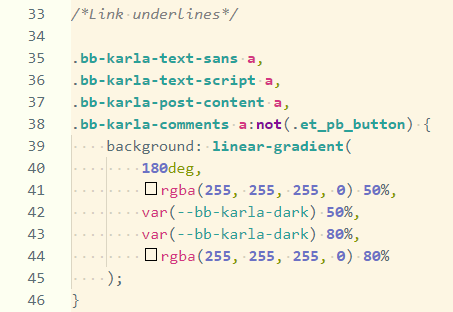
If you would like to edit or remove this link styling, find the Link underlines CSS within the stylesheet and either change, comment out, or delete it.
Updates & Bug Fixes
Version 1.1 Update – 28/07/2023
This update included regenerating the import package for changes made to how global presets are stored in the database.
Changelog
Version 1.1 – 28/07/2023
– Updated import package to fix issue with importing presets
Version 1.0 (Created)